Ah, the ancient practice of yoga. A tapestry of poses that promise to rejuvenate your mind, body, and soul. But today, we’re focusing on one specific pose: the Paschimottanasana, also known as the sit-up pose.
Originating from the Sanskrit words “Paschim” meaning “western”, “Uttana” meaning “stretch”, and “Asana” meaning “seated”, or in some cases, “pose.” So we combine those words to describe a “western stretch pose” or “western stretch seat.”
Strung together, they simple read Paschimottanasana (pahs-chi-mo-TAHN-ah-sah-nuh). Don’t worry, we promise performing the pose will be a lot simpler than pronouncing it!
This specific pose has been passed down from yogic scholars who believed in its power to energize the body and center the mind.
Highlighted in the Hatha Yoga Pradipika—a seminal text on hathayoga penned around the 16th century—this pose has stood the test of time. In that ancient guide, Paschimottanasana is described in a rather straightforward manner: “the pose is realized when one’s forehead touches the thighs.” So, this time-honored pose has been shaping spines and deepening stretches for centuries, and it’s not going out of style anytime soon.
This treasured gem in the world of Bikram yoga is more than just a stretch—it’s a step towards holistic wellness.
Before diving into the Sit-Up Pose, here is what we will cover in this article:
Why Should You Do the Paschimottanasana Pose?
How to Perform the Sit-Up Pose (Step-by-Step)
Why Should You Do the Paschimottanasana Pose?
Paschimottanasana is often considered the yin to the Head-to-Knee Pose’s yang, a variation commonly seen in other styles of yoga. While both are excellent for increasing flexibility, Sit Up Pose goes a step further.
How, you ask?
This pose strengthens and tightens the abdomen, firms and trims the lower body—think problem areas like thighs and hips, especially for women—and enhances spinal flexibility. In short, it’s a full-body tune-up every time you practice it.
At the most basic level, the forward-stretching sit-up pose is best known for exercising the back, but there’s so much more to it than just that:
Spinal Flexibility and Rejuvenation
As we mentioned, the sit-up pose is basically a day spa for your spine. As you stretch forward, you’re realigning your spine, improving your posture, and enhancing spinal flexibility. If you’ve been sitting at a desk all day or are suffering from minor back issues, this pose is your chiropractor in disguise.
Abdominal Aid
Fancy rock-hard abs without doing a single sit-up? Well, almost. Paschimottanasana strengthens and tightens your abdominal muscles as you work to maintain the pose. This is a great way of strengthening both your abs and internal organs by providing better support and promoting better digestion.
A Leg-up for Your Lower Body
We all have those “problem areas” we wish we could magically tone. The good news? Paschimottanasana works on firming and trimming the lower body. From your thighs to your calves, the pose engages muscles, ligaments, and tendons, while also boosting circulation in those often-neglected areas.
Hamstring Help
If you’ve ever felt the bite of tight hamstrings during sports or even just getting out of bed, this pose is for you. When you stretch your hamstrings, you’re not just increasing flexibility but also reducing muscle tension and the likelihood of related injuries.
Energize and Prepare
Bikram yoga can be strenuous. But the forward-stretching sit-up pose acts as an intermediary charging station between your poses. The act of stretching and holding releases pent-up tension, giving your body that much-needed jolt of energy. Plus, it prepares your body and mind for the challenges of the next pose in your sequence.
Torso Toning
Want to add some definition to your torso? The Sit Up Pose works on toning both the sides and faces of your torso as you engage your upper body muscles to maintain the posture.
How to Perform the Sit-Up Pose (Step-by-Step)
Okay, enough chit-chat! Let’s get you from zero to sit-up hero with these easy-to-follow steps.
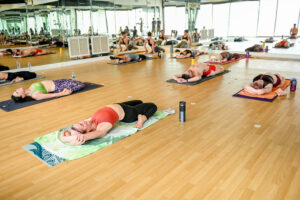
- Starting Position: Begin in Corpse pose (#13 in the Bikram series). Your back is flat on the mat, and your arms are beside you.
- Initial Movement: Flex your toes upwards toward the ceiling.
- Arm Placement: Bring both arms overhead and cross your thumbs. Take a deep inhale.
- The Sit-Up: As you exhale, use the force of your arms moving toward your toes to help you sit up, keeping your legs straight and heels on the ground.
- The Dive: Just before you’re fully upright, continue exhaling and dive forward toward your toes which are flexed toward you.
- Toe Grab: Grasp your toes, aiming to touch your forehead to your knees.
- Double Jerk: Touch the floor on either side with your elbows and give a double jerk forward, as you may have heard any Bikram yoga instructor mention.
If you find that you’re struggling with any given step, remember that abdominal strength isn’t built in a day. Stay motivated and consistent! Keep trying and you will eventually gain the right coordination and muscle memory for it.
Modifications for the Paschimottanasana
If you find the traditional Paschimottanasana pose too demanding, it’s alright. Yoga is about connecting with yourself, not breaking yourself. You’re doing just fine as long as you’re honoring your body’s unique capabilities.
Bend Those Knees
If straightening your legs while reaching for your toes feels like a Herculean task, bend your knees. Yep, it’s okay! In fact, it’s more than okay—it’s smart. You’re actively listening to your body and making adjustments, which is what yoga is all about.
Bending the knees takes some pressure off your hamstrings and lower back, allowing you to still experience the spine lengthening and abdominal strengthening benefits of the pose.
Gradual Extension
As you grow more accustomed to the pose and your flexibility starts to improve, you can begin straightening your legs little by little. This doesn’t have to happen overnight. It might take weeks or even months, and that’s absolutely fine.
Yoga is not a sprint; it’s a lifelong marathon where the only competition is your previous self.
Alternative Foot Grasps
If reaching for your toes is still out of reach even with bent knees, consider using a yoga strap or even the hem of your yoga pants to extend your grasp. Loop the strap or cloth around the soles of your feet, and hold onto the ends as you stretch forward. Over time, you may find that you no longer need the extra help.
Last Thoughts on the Paschimottanasana Sit-up Pose
And there we have it. The Paschimottanasana is a soothingly calm, while still demanding, pose that you can use to reset yourself as you transition to your next position.
As we’ve explored, Paschimottanasana is more than just a forward bend; it’s a holistic experience that caters to your physical and mental well-being. But perhaps the most profound takeaway from this classic pose is the lesson it teaches us about the yoga journey itself.
While the sit-up pose comes with a trove of physical and mental perks, mastering it also serves as a metaphor for personal growth and self-awareness. It urges us to approach challenges—whether they’re on the mat or in daily life—with adaptability, patience, and a generous dose of self-love. So, as you fold forward in Paschimottanasana, remember that the real benefit isn’t just the stretch or strength you gain; it’s the enduring wisdom that life, like yoga, is a practice that we continually refine over time.
If you’re interested in performing this pose in a formal class setting, you can register for a spot in one of our upcoming Bikram 26 and 2 classes.
FAQ
Q: Is Sit Up Pose suitable for yoga beginners?
A: Absolutely, the Sit-Up Pose is not only suitable for yoga beginners but also highly beneficial. This simple yet effective pose serves as a fantastic warm-up for the spine, gently stretching the hamstrings and energizing the entire body. It’s like the appetizer before the main course, setting the tone for your yoga practice and preparing you for more complex postures.
Q: How often should I practice Paschimottanasana?
A: For those new to Bikram yoga or even yoga in general, three to four times a week is a good starting point. This frequency allows you to experience the benefits of the pose without overwhelming your body. Once you’re comfortable, you can aim for daily practice. However, it’s crucial to listen to your body. Overdoing it can lead to strain or injury, and we don’t want that.
Q: Can I practice the pose if I have back issues?
A: If you have back issues, it’s crucial to approach this pose with caution and consult your healthcare provider before attempting it. Yoga is about tuning in with your body, not straining it. Modifications are your friend here; you can soften the intensity by keeping your knees bent or using props to support your back. Also, we highly recommend working one-on-one with a qualified Bikram Yoga instructor who can provide personalized guidance. So, the short answer is yes, but with a lot of caveats.

