Ah, yes, the Ardha Chandrasana. You’re here because you want to get a grasp on the Half-Moon Pose. Thankfully, you needn’t tread any further. We’ll help walk you through all of the steps and ways to approach the Half-Moon Pose so you can get the most out of it!
Do not feel discouraged if, at first, you find yourself stumbling through the steps. This is usually always the case for first-timers as they attempt to tackle the pose on their own.
Part of the mental journey in conquering the Half-Moon pose is the determination, resolve, and calm that you’ll find in yourself throughout the process of learning and performing the pose.
With that said, it’s time to dive into the walkthrough!
What is the Bikram Half-Moon Pose?
The Half-Moon Pose is an intensely helpful posture in Bikram yoga that will aid your balance and help adjust your entire body from common daily strains, like prolonged sitting.
It’s associated with the sacral chakra, which is illustrated by a crescent moon, tying to how tides of water are affected by the moon.
The Half-Moon Pose gives us the beautiful symbology of the moon’s energy in our body. Like the calm and stillness of the moon, you’ll aim to imitate it through cyclical motion as you transition gently into it.
Although it’s a moderately challenging position, the benefits are both physically and mentally satisfying and will give you a tremendous sense of accomplishment.
It’s typically performed on both sides of the body and aims to strengthen core muscles as well as correct any poor posture. It also builds mental and physical endurance through duration holding, which, as you’ll find, can be challenging with this position.
There are a couple of things to pay attention to as you learn this pose. For one, pay attention to your own breathing. You’ll find yourself having an immensely easier time if you try to regulate your breathing pattern slowly and calmly. The second thing is maintaining constant awareness of every muscle of your body that’s in use during the pose (spoiler alert, it’s going to be a lot).
Being attuned to your body’s motions will help you stay coordinated and give you better success with the pose more quickly.
Sanskrit for the Bikram Half-Moon Pose
Ardha Chandrasana (are-dah chan-DRAHS-anna)
“Ardha” translates to “half.”
“Chandra” translates to “god-like brilliancy, glittering, or light,” which alludes to “moon.”
“Asana” naturally translates to “sitting down.”
As mentioned, this is a radiant picture we’re getting from the Hal-Moon pose. You’ll come to find shortly that the outstretched image of your posture, once you complete the pose, will both look and feel radiant!
Why We Do It as the Second Pose
It’s naturally very intuitive how we transition into the Half-Moon Pose. It’s conveniently moved into through a Pranayama breathing posture, which is both a comfortable way to ease into the position and a method to hone concentration.
Because it’s a methodical and deliberate pose, it’s helpful to have the preparation beforehand from the previous breathing step. The stabilization you can get from a prior breathing step will help give you the focus and calmness you need to get the most out of the pose.
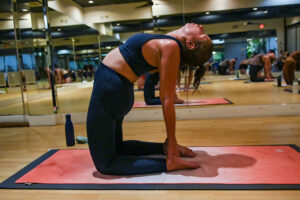
Step-by-step Walkthrough
- Begin with a Warrior II pose, and position your right foot in front of you with your knee aligned with your toes.
- Put your left hand on your hip and slowly reach out your right arm, moving it downward. Do this until your fingertips touch the ground in front of your right foot’s toes, similar to a hands-to-feet pose or padahastasana.
- Move your left foot backward, shifting your weight mostly onto your right leg.
- While you’re placing weight on your right leg, begin to extend your left leg upward as it begins to align with your hips.
- Put your right hand on that support from step one. This will aid you in balancing yourself as you find a comfortable resting state.
- Keeping your right foot rooted, begin to extend your left leg further by pressing outward through the ball of your foot (you’ll begin to feel tightness in your calves this way).
- While your right sitting bone moves backward, also move your hips to the side.
- Extend your left arm upward toward the ceiling as your chest turns outward.
- Find a comfortable resting state for your head, whether it be looking at the ground, horizontally at the wall, or at the ceiling.
- Take a deep breath five or six times, maintaining the tautness of your extended limbs.
- You may then move out of the position by lowering your extended back leg and moving backward through the Warrior II position.
- Now mirror these steps on the other side of your body!
Benefits of the Hands-to-feet Half-Moon Pose
The Half-Moon Pose affords a variety of mental, physical, and emotional benefits. Let’s run through a few of them now!
- Relieves mental stress, anxiety, and calms nerves
- Regulates breathing and overall respiratory health
- Improves balance and mental and physical focus
- Structures the spine and digestive organs to aid the bowels
- Alleviates menstrual symptoms
- Helps with pain in the lower back and hips
- Strengthens core muscles
- Shapes and tones the waist, hips, abs, thighs, butt, legs, ankles, and feet
- Improves the health of the colon, skeleton, and glandular system
- Builds mental and physical endurance
While the benefits are many, it is certainly a challenging position that should be approached carefully with precision and deliberation!
Things to Watch Out For During the Half-Moon Pose
Be cautious when attempting the Half-Moon pose, as it’s considered a moderately challenging position. It will require very attuned awareness by the poser in order to maintain balance and not agitate or needlessly strain other parts of the body in the process.
Ensure you do not lock your knees during any step of the pose, as this will cause a lot of unnecessary pain and sap your energy.
Be mindful of where your raised leg is positioned during the pose. It’s common to fall into the habit of raising it too high or allowing it to drift behind the space you’re in. Your aim should be to maintain as linear of an up-and-down posture as you can, staying flat. To moderate this for yourself, you can have someone assist you or practice the move standing flat against a wall.
In cases where your neck feels strained, default to looking at the ground, as this is usually the most natural position for your head.
How to Modify the Half-Moon Pose with Hands
The original method outlines putting your hand to your feet, but don’t feel like you can’t use a yoga block or suitable alternative. You can add a preliminary step to the walkthrough above by preparing a yoga block, a box, or something firm that can support you by placing it in the right-hand corner of your yoga mat.
For a greater challenge, you can try holding the pose for 30 – 45 seconds at a time.
You can also try removing your hand from the ground by your feet, keeping it lightly above the ground without touching it, or bringing your palm to your torso.
Joining Your Community for Advanced Poses and Techniques
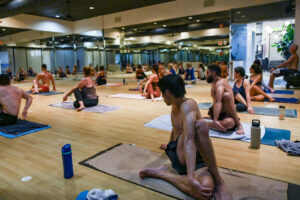
Besides practice, the best way to improve your yoga technique and subsequently master poses like the Half-Moon, is by doing your exercises in a group.
Having an instructor and other students to support you (and vice versa) will greatly improve the accuracy you can hope to achieve with your poses. Look into local groups you can join or even online virtual classes that can allow you to share with others your journey toward physical and mental excellence.
Having an instructor and other yogis to support you (and vice versa) will greatly improve the accuracy you can hope to achieve.
Book a class with us today!