If you frequently have lower back pain, the odds are that your lower torso strength is in need of some loving attention! Consequently, the Ardha Salabhasana (or Locust pose) can gradually reinforce your back, hip, and buttocks muscles.
This iconic yoga pose isn’t just any stretch; it’s a powerful tool that has the potential to gradually transform the strength and continuity of your lower torso. Think of it as an act of self-love for your lower body, a way to address and alleviate that nagging lower back pain that has been a constant companion.
So, if you’re ready to embrace a path toward a stronger, more resilient lower torso without the burden of persistent pain, all you need is your trusty yoga mat. Together, we’ll unroll a treasure trove of valuable tips that will empower you on your yoga journey.
Now, let’s delve deeper into what you can expect in this article:
Firstly, we’re going to explore the transformative experience of the Locust pose, one step at a time. We’ll uncover the benefits you can gain from it and where it fits into the whole sequence of Bikram Yoga.
So, grab your mat, and let’s unroll some tips together!
What lies ahead in this comprehensive guide:
The Depth Within the Ardha Salabhasana
The How-to: Step-by-Step Guide
Benefits
Modifications
In the Context of Bikram Yoga and Hot Yoga
FAQs
The Depth Within the Ardha Salabhasana
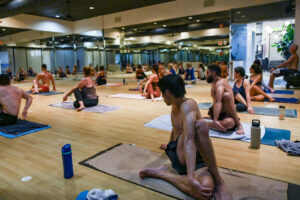
At first glance, Ardha Salabhasana might seem like a straightforward pose—after all, how complex could it be to lie on one’s belly and lift the limbs? But as countless yogis can attest, stepping into a Bikram yoga studio—or any yoga studio, for that matter—often shatters such assumptions.
The warm, invigorating atmosphere sets the stage for a journey through a series of poses, each with its own set of challenges and rewards.
When it comes to Ardha Salabhasana, the initial act of positioning oneself is simple enough. Yet, the moment you attempt to elevate your arms and legs, you will inevitably deal with its surprising intricacy. Some compare it to planking with a bit more complexity. It’s an engagement of the core and back muscles that demands precise alignment and balance.
But don’t let this deter you. The pose is as rewarding as it is challenging. Many find that with consistent practice, it turns into an enlightening experience, revealing layers of inner strength and resilience.
The very act of holding oneself in this lifted position becomes more than a physical exercise; it evolves into a metaphor for life’s challenges and our ability to rise above them. Indeed, Ardha Salabhasana serves as a powerful reminder that we are often far more resilient than we initially believe.
The How-to: Step-by-Step Guide to Ardha Salabhasana
Alright, let’s cut to the chase and get into the specifics of performing this livening pose. Whether you’re into hot yoga or prefer a more temperate setting, these steps are your ticket to mastering the Locust pose.
Step 1: The Groundwork
Start by lying flat on your belly on the yoga mat. Place your arms by your sides, palms facing down. Make sure your legs are straight, and press the tops of your feet firmly against the mat.
Step 2: Alignment and Focus
Position your chin on the mat, gazing forward. Your neck should be neutral, neither strained nor lax.
Step 3: The Core Lift
Inhale deeply. As you exhale, engage your core muscles. This is your powerhouse; feel it activate. Slowly elevate your head, upper torso, and legs away from the mat. In some cases, you may opt to elevate one leg at a time and alternate between the two, but elevating both at the same time is also perfectly fine.
Step 4: Balance and Poise
Extend your arms backward, parallel to your body.
The key is in the lift. Use the strength from your back and core, avoiding the temptation to push off the mat with your hands.
Step 5: Holding the Pose
Maintain the Locust pose for 30 to 60 seconds. And don’t forget to breathe—it’s surprisingly easy to hold your breath when you’re this focused. Concentrate on the sensations going on with each part of your body. You should feel amounts of tension in your neck, thighs, back, shoulders, and pelvis.
Try to regulate your breathing slowly so you can retain calmness. If you start to shudder or gasp too deeply, you may throw yourself off balance, forcing your muscles to work harder than they need to (thus tiring you out quicker).
Step 6: Graceful Exit
On an exhale, gently lower your body back to the initial resting position on the mat.
The Benefits: Why Ardha Salabhasana is a Must-Do
The Locust Pose benefits are manifold, offering something for both the body and the mind.
Strengthening Core and Back Muscles: The pose is a fantastic core workout. Your lower back and abdominal muscles will thank you.
Posture Perfection: Regular practice can significantly improve your posture. It’s like a wake-up call to all those back muscles you didn’t know you had.
Respiratory Boost: The combination of the room temperature and the Locust pose opens up the chest, aiding better cardiorespiratory health. Your lungs get a fuller stretch, enabling more oxygen intake.
Stress-Be-Gone: Despite its physically challenging nature, the pose has a calming effect. It’s like a mini-meditation session in the middle of your routine.
Modifications: Tailoring Ardha Salabhasana to Your Needs
Not every pose is one-size-fits-all. Ardha Salabhasana is versatile enough to be modified to suit your individual needs.
For Beginners
Using a yoga block beneath your pelvis can help you by offering a little extra lift to ease into the pose.
For Advanced Yogis
As mentioned before, you can try alternating diagonal opposite limbs to give yourself a bit more of a challenge. In other words, if you start with all of your limbs resting flat, you can start by lifting your right arm and left leg simultaneously for about 30 to 60 seconds. After that, lower them both and repeat the process with your left arm and right leg.
For Those with Physical Limitations
If you have back issues, lift only your upper torso, keeping your legs grounded. This pose can be demanding on your body, especially if you don’t have much flexibility. Lifting just your torso will help train your muscles to ease into the position without all of the pressure needed to lift your abdominal areas, pelvis and legs as well.
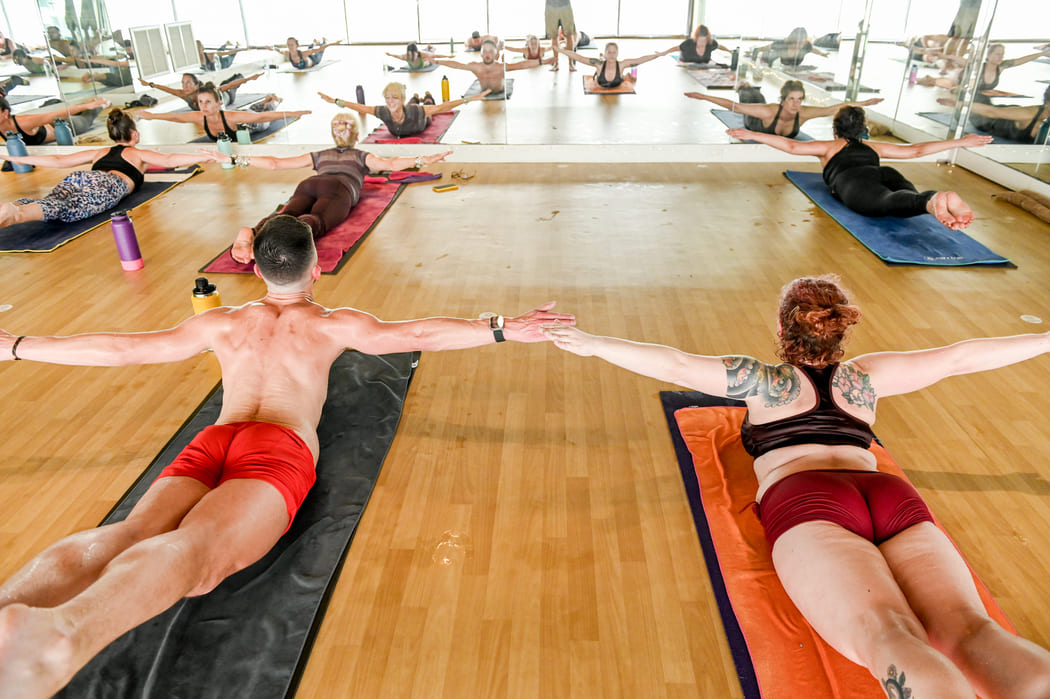
In the Context of Bikram Yoga and Hot Yoga
What gives the Ardha Salabhasana a fitting place in the Bikram yoga sequence is its inherent design for core strengthening and stress relief. In a hot yoga setting, it can be particularly detoxifying as the increased room temperature can aid in deeper stretches and better flexibility.
Try to be patient with it. If your body isn’t used to this type of position, it will take some time to acquaint your body with this type of position. In the same way, cheerleaders and gymnasts don’t just dive headlong into a split on their first attempt, you will similarly want to work on maximizing your elevation in phases, lifting higher off the ground each time.
Wrapping Up: Trying Out the Locust Pose
So there you have it—Ardha Salabhasana demystified and served up for you to integrate into your yoga journey, whether it’s in a Bikram yoga class or your cozy living room. The Locust pose has something for everyone: core strengthening, posture correcting, and peace-inducing properties. As you lift yourself in this pose, you might just find you’re also lifting your spirit.
If you’re new to this pose, remember: Rome wasn’t built in a day, and neither is any yoga practice. Start with the basics, opt for modifications when necessary, and, most importantly, listen to your body. If you’re an experienced yogi, consider this a warm (or hot?) invitation to delve deeper into a pose that you might have underestimated.
Ready to embrace the challenge? This guide should be all you need to attempt the position on your own. Or, if you’d like to try it out in a guided session, you can register for one of our 26 and 2 Bikram Yoga classes, where we’ll walk you through each stage of the position (all in a nice, toasty 110° space)! We hope to see you there.
Namaste.
FAQ
Q: Why is the Locust pose so hard?
A: The challenge here lies in its demands on your core strength, flexibility, and muscle coordination. Imagine lifting your legs and upper body while keeping your pelvis grounded; it’s like playing Twister with gravity! It also requires mental discipline to maintain balance and focus. Don’t sweat it, though. With consistent practice and maybe a bit of guided instruction, you’ll conquer the Locust Pose in no time.
Q: What if I can’t handle the heat while trying to focus on the Locust Pose?
A: it’s perfectly okay to take a step back. Your safety and well-being are our top priorities. Ease out of the pose and take a seated position, sipping some water if needed. You might also want to lie down in Savasana to reset. Over time, as you acclimate to the heat, you’ll find it easier to focus on your poses.
Q: “Is the Locust pose safe for my back?”
A: Absolutely. The Locust pose can be a great asset for spinal health when executed correctly. It helps to strengthen the muscles along your spine and improves your posture. However, like any exercise, it’s essential to listen to your body. If you have a history of back issues or chronic pain, it’s advisable to consult a healthcare professional before diving into this pose.