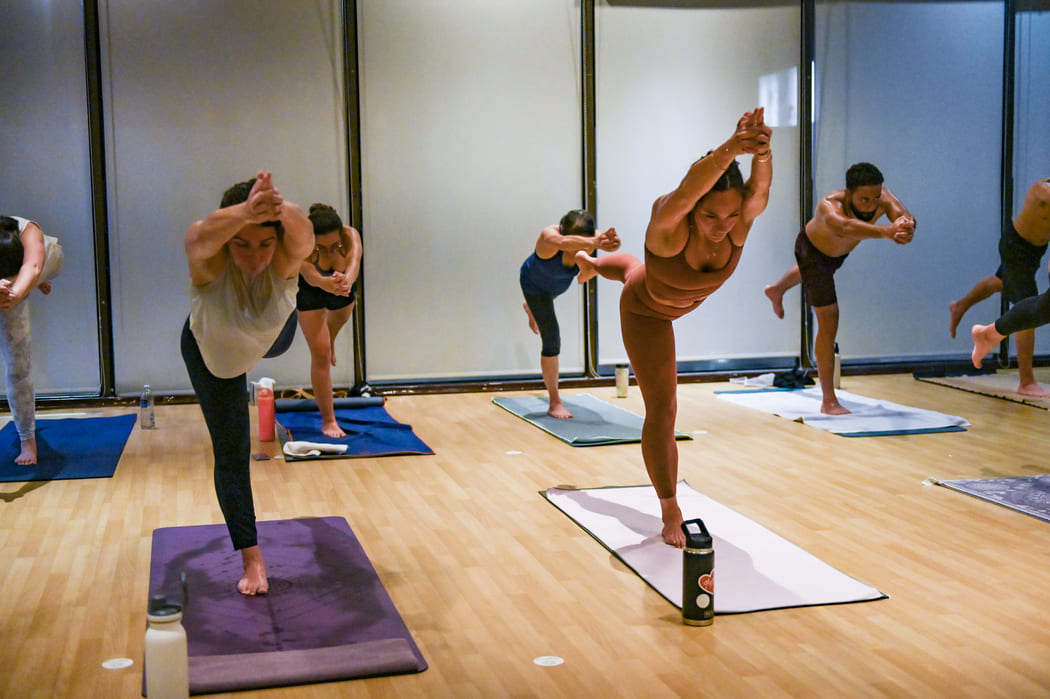
Trees have a serene presence – something I think about when practicing the Tree Pose or Vrikshasana. Trees stand tall, staying balanced even when powerful winds try to knock them down.
Likewise, when we face our own winds in life, there’s always a spot waiting for us on the mat where we can regain our sense of balance and calm. As you continue your yoga practice, you might notice a deeper connection with yourself, just like a tree connects with the Earth.
So, whether you’re here to learn a little about Bikram Yoga or you’re ready to start practicing Tree Pose, let’s keep that image in mind. Today, we’re not just hurrying to do the next thing on our to-do list. Instead, we’re calm, strong trees, ready to take on whatever comes our way.
Before diving in, here is what we will cover in this article:
History of Tree Pose
Step by Step Instructions
Modifications
Benefits
Bikram Yoga
FAQs
History of Tree Pose
Tree Pose originates from the Sanskrit language, “vrksa,” meaning “tree,” and “asana,” meaning “pose.” In addition, trees appear throughout religious and ancient literature as symbols of life, knowledge, and spirituality. The Tree Pose itself, or Vrikshasana, has a long history in ancient traditions and religious practices. Within India’s historic temples, sculptures often depict yogins in Vrikshasana, a sign of its long-standing importance in the world of yoga.
In Hinduism, one story that talks about the Tree Pose involves King Bhagiratha, who is said to have stood in the pose for years. According to the tale, his goal was to convince the gods, Lord Brahma and Lord Shiva, to allow the Ganges River, one of the most sacred rivers in Hinduism, to flow to Earth. For this purpose, the Tree Pose is associated with strength and perseverance.
Tree Pose: Step By Step
Before we get into Tree Pose, take a moment to pause. Whether you’re comfortably seated reading this or standing on your mat, allow yourself some time to breathe deeply. Inhale slowly, feeling your lungs fill up with fresh air. Lastly, exhale fully, releasing any tension that you might be holding onto.
Set an intention for your practice or your day ahead. At YogaSol, we believe yoga is not just about the physical poses but about your mindset too. So, as you stand there, either in spirit or physically on your mat, remind yourself to be fully present, kind to yourself, and open to the practice that lies ahead.
Steps:
- Stand Tall: Start in Mountain Pose at the top of your mat. Your feet should be about hip-width apart, your body tall and straight, arms relaxed by your sides.
- Find Your Balance: Begin by shifting all of your weight onto your left foot. Feel the connection of your foot with the earth below. Let this foot become your anchor.
- Position Your Foot: Bend your right knee. Using your right hand, place the sole of your right foot against the inner left thigh. If this is difficult, you can also place your right foot on your left calf instead. Be sure you’re not placing it directly on your knee.
- Align Your Hips: Try to keep your pelvis neutral and facing forward. It’s not about how high your foot goes; it’s about maintaining balance and alignment.
- Center Yourself: Meanwhile, press your palms together at your chest once your foot is in place. This is known as the prayer position. Feel the symmetry in your body and take a moment to center yourself.
- Lift Your Arms: When you’re ready and feeling balanced, inhale and reach your arms above your head. You can keep your palms together or separate them, depending on what feels best for you.
- Breathe and Focus: With each breath, imagine yourself growing taller, like a tree reaching for the sky. Hold the pose for 5 to 10 deep breaths, focusing on the sensation of your body and the rhythm of your breath.
- Release the Pose: On an exhale, slowly bring your hands back to your chest and lower your right foot back to the floor, returning to Mountain Pose.
- Repeat: Repeat from step 1 on your left side if able.
Modifications
Not everyone can get into Tree Pose right away, and that’s okay! Here are some modifications you can try:
Foot on the Ground: If balancing on one foot is too hard, you can keep the toes of your bent leg on the ground, resting the heel against your standing ankle.
Use a Wall: If you’re struggling with balance, try doing the pose near a wall. Simply keep one hand on the wall to help keep your balance.
Use a Chair: For those who find standing challenging, you can use a chair and sit while practicing Tree Pose. Sit up straight, place one foot flat on the floor and rest the ankle of your other leg on your knee. This variation will still help you with hip mobility and body awareness.
Benefits of Tree Pose
Practicing Tree pose regularly will benefit your mind and body in many ways.
Improves Balance and Stability: The Tree Pose is like a balancing game on one leg, but with benefits! It strengthens your legs and core muscles and helps you balance on and off the mat.
Better Movement: The Tree Pose is a workout for your hips. With regular practice, you may notice the muscles around your hips are stronger and more flexible. Over time, this will help you walk, run, and move easier.
Helps You Become More Body Aware: Practicing the Tree Pose will bring greater awareness of what is going on in your body – how you’re standing, how your muscles are working, and how your body is moving. This will help you feel more connected to your body and avoid injuries, both while doing yoga and in everyday life.
Promotes Calm and Focus: With practice, the benefits you experience while in this pose are stress relief, calmness, and a sense of focus. Because of this, you might notice stressful situations are easier to handle, and you have a sense of peace that you carry with you throughout your day.
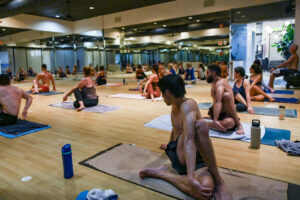
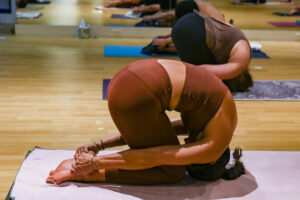
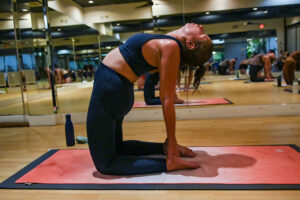
Bikram Yoga
Bikram Yoga, originally developed by Bikram Choudhury in the 1970s, pulls from traditional hatha yoga techniques and is practiced in a room heated to 110 degrees Fahrenheit with 60% humidity. Practicing Bikram feels like a dance in a sauna – balancing, stretching, and pushing your body in ways that might surprise you, all while the heat encourages a deep, detoxifying sweat.
Bikram Yoga is like the “greatest hits” playlist of yoga – 26 asanas, or poses, that we groove to in every class. And just like your favorite tunes, we hit these Bikram Yoga poses in the same order every time. It’s a routine that feels familiar yet challenges you with each practice.
All things considered, attending an in-person yoga class can be an investment in yourself and your yoga practice. Bikram Yoga classes, as we have at YogaSol in Norwalk, CT, can help keep you accountable to your practice. Here at YogaSol, our skilled instructors are passionate about Bikram Yoga.
For example, each instructor brings their unique teaching style and shares their passion, knowledge and enthusiasm with every class. Whether you’re a seasoned yogi or it’s your first time hearing the term’ asana,’ we want to make you feel at home, turning up the temperature and turning down the stress.
FAQs for Tree Pose
What if I can’t balance properly in Tree Pose? I’m really not that coordinated.
The beautiful thing about yoga, especially Tree Pose, is that it’s flexible and can be adapted to your abilities. If you find balancing tough, you can modify the pose by keeping your toes on the ground and resting your heel against your ankle. Over time, as your strength and balance improve, you’ll be able to lift your foot higher and eventually achieve the full pose. It’s all about progressing at your own pace!
I’m worried that my clothes might become see-through when I sweat. What should I wear?
You’ll want to opt for clothing that’s both comfortable and made from moisture-wicking fabric. For this reason, look for yoga-specific clothing that’s designed to handle sweat while providing enough coverage. Dark colors can also help reduce any see-through issues. A fitted top and leggings or shorts are typically good options. Always choose what makes you feel the most comfortable and confident in class.
What if I fall and embarrass myself in front of everyone in the class?
In short, the fear of falling or stumbling during a pose is natural, especially when starting out. Remember, yoga is a personal journey, not a performance. Everyone in the class is focusing on their own practice, not judging others. And if you wobble or fall – it’s completely okay! In fact, it’s a sign that you’re challenging yourself and growing. So, embrace the wobbles and keep going!